
A thin ribbon of bright green poured into warm milk. The color blooms. The surface goes pale jade, then settles, and the aroma lifts — grassy, a little sweet, faintly like fresh cream before cream was ever added. That is the moment a Matcha latte becomes more than just a green drink. The difference between a chalky, bitter cup and a genuinely good one almost always comes down to the tea itself and a few small choices in how you handle it.
We make Matcha lattes at FETC more often than we probably should, and what we have learned over time is simple: technique matters, but only because the tea deserves it. A good Matcha latte is not a diluted bowl of Matcha. It is a different drink — one where milk becomes the backdrop and the tea stays vivid in front of it. This guide walks through both hot and iced versions, the milks and sweeteners that work best, and the common mistakes that turn a promising cup into a disappointing one.
Choosing the right Matcha for your latte
Not all Matcha is meant for milk. That is the first thing to understand, and it changes everything that follows. The powder you see labeled "culinary grade" is designed for baking, smoothies, and recipes where sugar and fat do the heavy lifting. Some of it works reasonably well in a latte. Some of it turns bitter, flat, or dull — exactly the chalky green drink people complain about online.
What you want for a latte sits in a middle zone. Not the highest ceremonial Matcha you can find, which is best enjoyed whisked in water where its delicacy can speak without interference. And not the cheapest culinary powder, which often lacks the sweetness and color to hold its own against milk. A good latte-grade Matcha has enough body to stay present, enough natural sweetness to taste balanced, and enough vivid green color to make the cup actually look alive.
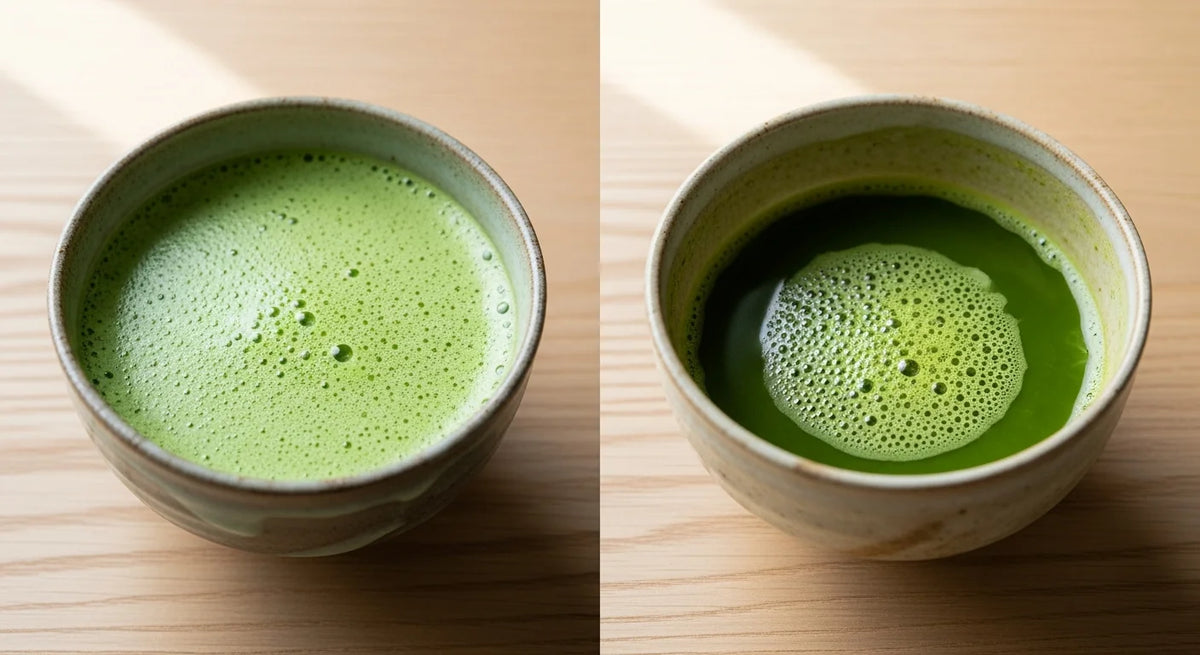
Color is one of the fastest indicators. Bright, saturated green usually signals younger leaves, better shading, and more chlorophyll — all of which translate into smoother flavor and more visual impact in the cup. Dull, yellowish-green powder often points to older harvests, less shading, or degraded freshness. It can still dissolve, but the result tends to taste flat and tired once milk enters the picture.
Bitterness matters too. Some bitterness in Matcha is natural and even pleasant, but a latte amplifies it. Milk softens sweetness more than it softens bitter edges, so powder that tastes slightly sharp in water can become genuinely unpleasant in a latte. When tasting Matcha for latte use, try a small amount in water first. If it feels balanced and relatively gentle there, it will almost certainly work well with milk.
If you want to understand what separates one Matcha from another — why shade-growing changes chemistry, how cultivar shapes flavor, what makes a powder genuinely ceremonial versus merely labeled that way — our guide to Ceremonial Grade Matcha goes deeper. And for the raw material behind the powder, our piece on Matcha and Tencha connects the leaf in the field to the tin on your counter.
How to make a hot Matcha latte
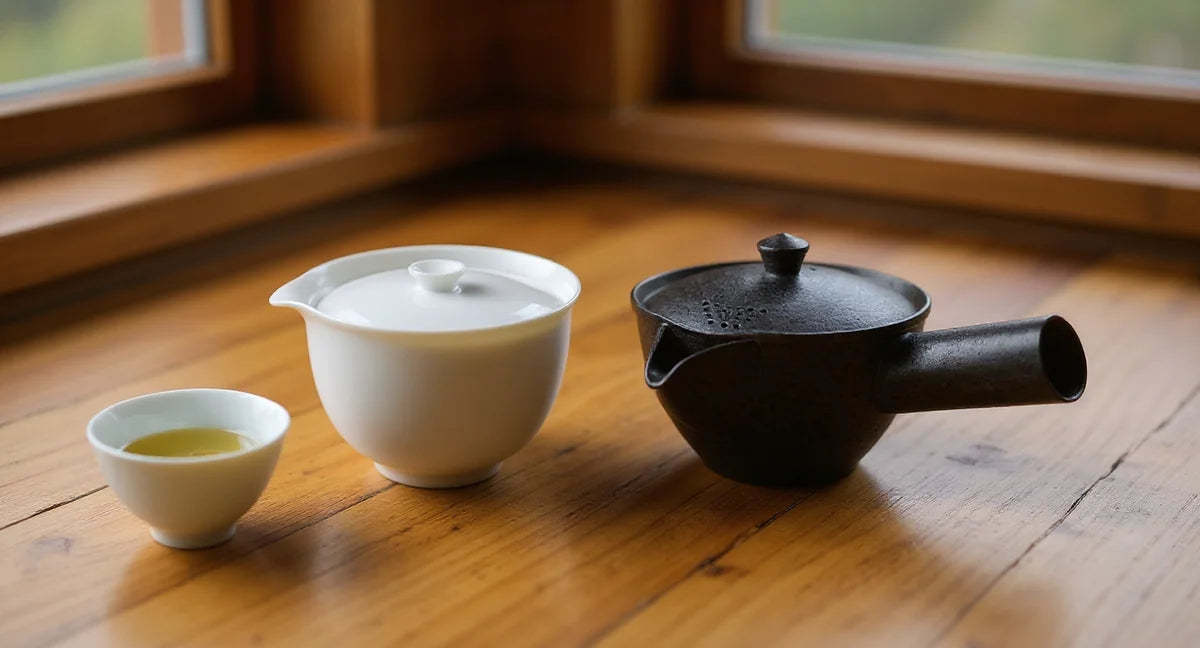
What you need
Ingredients are minimal. Two grams of Matcha (roughly half a teaspoon, or about 2 scoops of a bamboo chashaku), 30 to 40 mL of hot water at around 80°C / 175°F, and 150 to 180 mL of your preferred milk. A small amount of sweetener is optional. That is the whole list.
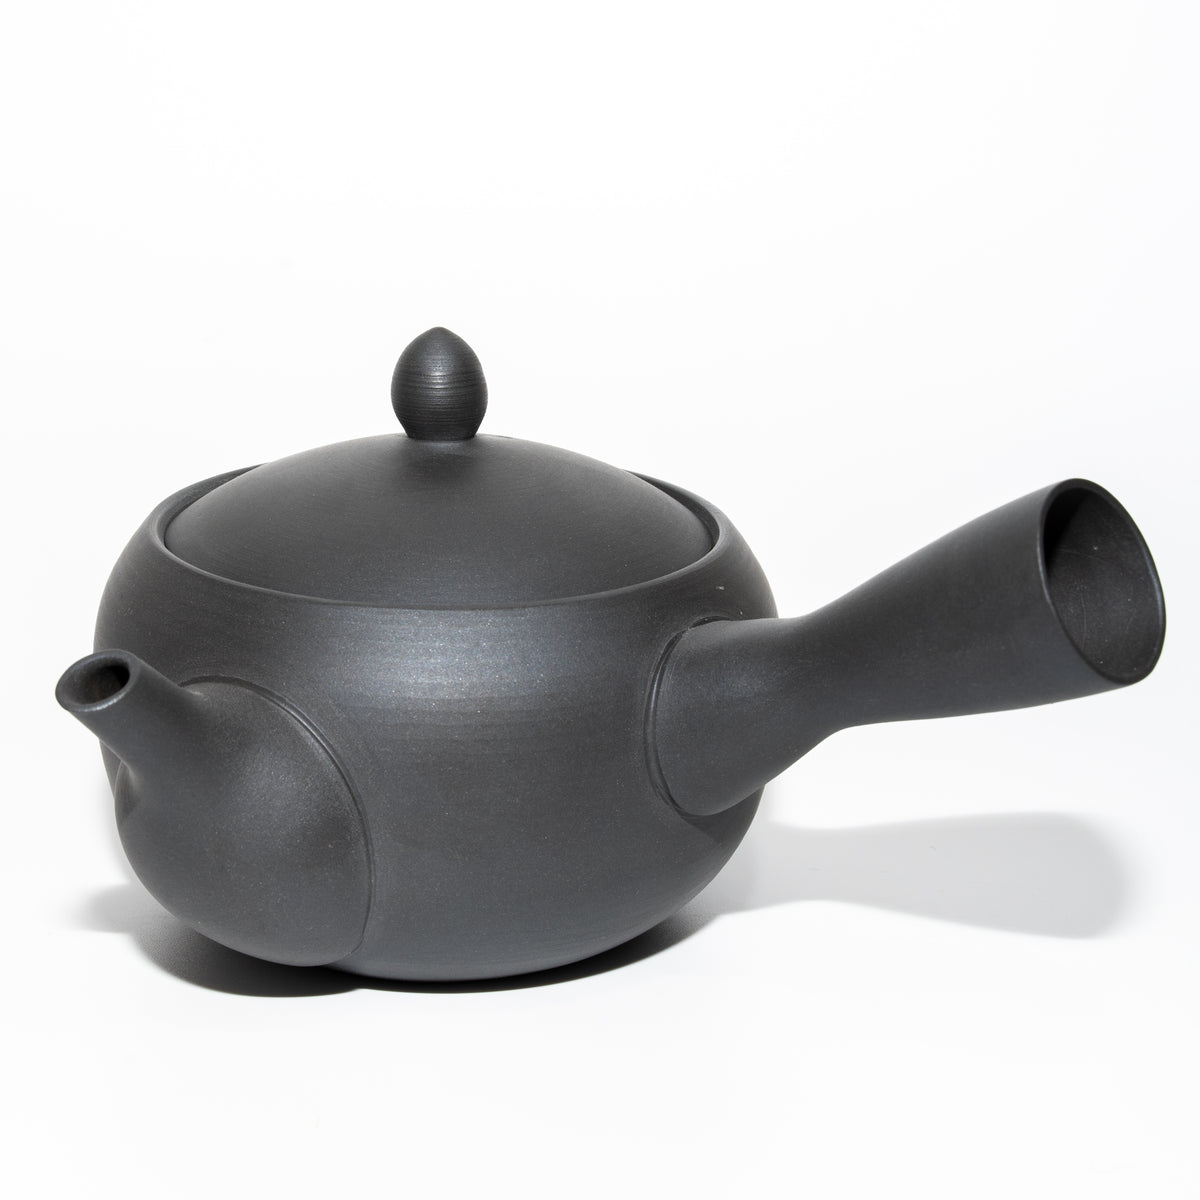
For equipment, the ideal setup includes a Matcha bowl or a wide cup, a bamboo whisk (chasen), a fine-mesh sifter, and a milk frother or small saucepan for heating milk. You can use a regular mug and a small kitchen whisk if that is what you have, but the bamboo whisk makes a noticeable difference in texture. The tines are designed to suspend fine powder evenly, and that suspension is what keeps the Matcha smooth instead of gritty once it meets the milk.
For a closer look at what each tool does and how to choose between them, our Matcha tools guide covers everything from whisk tine counts to bowl shapes.
Step by step
Start by sifting the Matcha into your bowl. This step prevents clumps more effectively than any amount of whisking after the fact. Matcha powder attracts moisture and compresses in the tin, and those tiny clumps do not dissolve cleanly once water hits them. A quick pass through a fine sieve breaks the powder back into a soft, even layer. Ten seconds of sifting saves minutes of frustration.

Add the hot water. Not boiling — 80°C / 175°F is the target. If your kettle just came to a full boil, pour the water into another cup first and wait about 30 seconds. That small temperature drop matters. Higher temperatures pull more catechins from the powder, which means sharper bitterness and a harsher finish. At 80°C, the balance tips toward theanine, the amino acid behind Matcha's natural sweetness and umami. In a latte, that gentler extraction is exactly what you want, because milk will not rescue a bitter base.
Now whisk. Hold the chasen upright, tips just off the bottom of the bowl, and move your wrist in quick back-and-forth strokes — the motion people often describe as a narrow "W" or "M" across the center. Fifteen to twenty seconds is usually enough. You are not aiming for the thick, fine foam of a traditional bowl of Matcha here. You want a smooth, even suspension with a light froth on top. The goal is a concentrated green liquid with no lumps and no dry powder clinging to the sides.

If you want to refine your whisking technique beyond latte-making, our guide on how to prepare Matcha covers the full motion in detail, from soaking the whisk to finishing the foam.
While the Matcha rests, heat your milk to 60 to 65°C. This is warm enough to feel comforting but not so hot that it scalds or develops a cooked flavor. If you are using a frother, this is when you froth. If you are using a saucepan, a small whisk or even a fork agitated quickly in the hot milk can produce a decent layer of microfoam.

Pour the whisked Matcha into your cup first, then add the frothed milk. Pouring the milk over the Matcha keeps the green concentrated at the bottom and creates the layered look that makes the drink visually appealing. Stir gently if you prefer a fully blended cup, or leave it layered and let the colors merge as you drink.

Getting the foam right
Foam in a Matcha latte serves a different purpose than foam in coffee. It is not structural. It is textural. A thin layer of microfoam on top makes the first sip feel softer and creamier, and it holds the Matcha aroma closer to the surface where you can smell it before it reaches your mouth. Thick, stiff foam is not the goal. Light, velvety, and just barely holding its shape — that is the texture to aim for.
The easiest tool is a handheld electric frother. Submerge it just below the surface of the heated milk and run it for ten to fifteen seconds. Move it slowly upward as the foam builds. A French press also works well: pour in the hot milk, pump the plunger rapidly about fifteen times, and you get consistent, fine-textured foam.
If the foam collapses immediately after pouring, the milk was probably too hot or too thin. Whole milk and oat milk froth the most reliably. Almond milk tends to produce less stable foam. We will get into the details of each milk option further down.
How to make an iced Matcha latte
The iced version uses the same logic as hot: make a concentrated Matcha base with hot water first, then pour it over ice and cold milk. The key difference is concentration — because ice dilutes, use a slightly smaller water volume (25 to 35 mL instead of 40) or a touch more powder to keep the color vivid and the flavor present. The base ingredients are 2 g of Matcha, around 80°C water, and 150 to 200 mL of cold milk.
Step by step
The iced version follows the same logic: make a concentrated Matcha base first, then combine it with cold milk over ice. The order changes slightly, and temperature management becomes the main variable.
Sift and whisk the Matcha with 30 to 40 mL of hot water, exactly as you would for the hot version. The water still needs to be around 80°C to dissolve the powder properly. Cold water will not suspend Matcha evenly, and you will end up with visible clumps floating in an otherwise clean glass. This is the step people skip when they try to make iced Matcha quickly, and it is usually the reason the drink fails.
Fill a tall glass with ice. Pour the whisked Matcha concentrate over the ice. Then add 150 to 200 mL of cold milk. Stir gently once or twice. The drink layers itself naturally — dark green at the bottom, pale green through the middle, white milk pooling near the top. That gradient is part of the appeal.
Keeping the color vivid over ice
Matcha fades. It is one of the realities of the powder. Chlorophyll is sensitive to light, heat, and time, and once Matcha meets liquid, the clock starts running. In a hot latte, the color stays vivid for the few minutes it takes to drink. Over ice, the drink sits longer, and that bright green can shift toward olive or brown if the Matcha was old, poorly stored, or low quality.
The best defense is fresh, high-quality powder. Matcha that was vivid green in the tin will stay vivid green in the glass far longer than powder that was already fading before you opened it. Keeping the drink cold also helps. Ice slows oxidation. Direct sunlight speeds it up. If you are making an iced Matcha latte for a photo or a leisurely afternoon drink, keep it out of the sun and drink it within about twenty minutes for the best color and flavor.
The layered look — tea first or milk first?
For a clean layered appearance, pour the milk over ice first, then slowly pour the Matcha concentrate on top. The Matcha, being denser from the dissolved powder, will sink through the milk and create visible striations. This is the café-style presentation: clean layers, clear contrast, and a look that photographs well.
For a fully blended drink, reverse the order: Matcha over ice first, then milk, then stir. The result is a uniform pale green. Less dramatic, but the flavor is more evenly distributed throughout. Neither approach is more correct. It depends on whether you care more about the layered appearance or an evenly mixed drink. We tend to pour Matcha first when making one for ourselves, and milk first when we want a cleaner presentation for a guest.
Milk and sweetener guide
Whole dairy milk is the most forgiving starting point — it froths reliably and softens any remaining bitterness without competing with the tea. Of the plant-based options, barista oat milk comes closest: it has a natural grain sweetness that complements Matcha and produces consistent foam. For sweetener, add it to the whisked Matcha concentrate before the milk goes in, while the liquid is still warm, and it will distribute evenly without pockets of sweetness.
Which milks work best
Milk choice changes a Matcha latte more than most people expect. Each option interacts differently with the tea's flavor, body, and color.
Whole dairy milk is the classic. It froths well, gives the richest body, and its natural fat content softens any remaining bitterness in the Matcha. The cup feels full and rounded. If you have no dietary restrictions and want the most forgiving version of this drink, whole milk is the safest starting point.
Oat milk has become Matcha's closest companion outside of dairy. It has a natural grain sweetness that complements rather than competes with the tea, it froths consistently, and it produces a creamy body that comes very close to whole milk. Barista-style oat milk, which contains added fats for better steaming, tends to perform best. Standard oat milk can be thinner, but it still works. Of all the plant-based options, this is the one we reach for most often.
Soy milk is a good option when you want protein and a neutral backdrop, but it has a caveat. Unsweetened soy milk can curdle when it meets acidic or very hot liquids. Matcha is mildly acidic, and the combination occasionally produces visible separation — small white flecks floating in the green. Sweetened soy milk is more stable. If you prefer unsweetened, let the Matcha cool slightly before combining, and pour gently rather than dumping the milk in all at once.
Almond milk is light and clean. It lets the Matcha flavor come through clearly because there is less competing richness. The trade-off is body. Almond milk is thinner than dairy or oat, and it does not froth as well. The foam tends to be airy and short-lived. If you like a leaner latte and do not mind less foam, almond milk works. If foam matters to you, it can be frustrating.
Coconut milk adds a tropical note that either works beautifully or distracts, depending on your taste. It pairs well with sweeter Matcha and less well with savory, umami-heavy powder. The body is thin unless you use full-fat canned coconut milk, which produces a very rich, almost dessert-like drink. Coconut milk from a carton is much lighter. Try it as a warm-weather variation rather than a daily choice.
Sweetener options
If you choose to sweeten, timing matters. Add your sweetener to the whisked Matcha concentrate, before the milk goes in, and stir until dissolved. Adding sweetener after the milk makes even distribution harder, and you end up with pockets of sweetness rather than a balanced cup.
Honey dissolves best in warm liquid and adds a floral roundness that works well with grassier Matcha. Maple syrup blends easily at any temperature and brings a gentle, woodsy sweetness that sits in the background without pushing the tea aside. Simple syrup (equal parts sugar and water, dissolved) is the cleanest option — pure sweetness with no competing flavor. It is what most cafés use because it disappears into the drink.
A teaspoon is usually enough. Start with less than you think you need. You can always add more, but you cannot take it back once sweetness starts covering the tea.
The no-sweetener approach
Here is the thing about sweetener in a Matcha latte: if the Matcha is good enough, you do not need it. High-quality Matcha carries its own natural sweetness from theanine and amino acids developed during shade-growing. When that sweetness meets the fat in milk, the cup already feels rounded and gentle without any added sugar.
We drink most of our Matcha lattes unsweetened. Not out of discipline, but because the tea we use has enough depth and natural sweetness to stand on its own. If you find yourself reaching for the honey every time, it may be worth trying a better Matcha before adding more sweetener. The solution to a flat-tasting latte is often better tea, not more sugar. For a broader look at what sets Matcha apart from other green teas — and why it behaves so differently in milk — our comparison of Matcha vs green tea fills in the background.
Common mistakes and how to fix them
Most Matcha latte failures trace back to three sources: skipping the sift (which causes clumping), water that is too hot (which drives bitterness), and milk that is overheated past 70°C (which causes separation or a flat, cooked flavor). Each problem has a straightforward fix, and once you identify which one is affecting your cup, the adjustment is usually minor and immediate.
Clumpy texture is the most common complaint. The Matcha powder did not dissolve evenly, and you can feel small granules on your tongue or see them stuck to the sides of the cup. The fix is always sifting. Always. No matter how fresh the powder is or how vigorously you plan to whisk, sifting first breaks up the compressed particles and gives you a dramatically smoother result. If you sifted and still have clumps, make a paste with a tiny amount of water before adding the full volume. Work the paste with the whisk until it is perfectly smooth, then add the remaining water.
Bitterness is the second issue. A Matcha latte that tastes harsh, astringent, or unpleasantly sharp is almost always a temperature or quality problem. Water above 85°C pulls excess catechins from the powder and pushes the flavor toward bitterness. Low-quality Matcha, especially from later harvests with less shading, starts with a higher bitter baseline that milk cannot fully mask. Fix the temperature first — bring it down to 80°C. If bitterness persists, the powder itself may be the issue. Our article on Matcha and caffeine touches on how extraction conditions affect what ends up in the cup.
Weak or watery flavor means the tea is getting lost in the milk. This is not a milk problem. It is a Matcha problem. Use more powder rather than more sweetener. Two grams is the standard, but if your cup tastes diluted, move to 2.5 or even 3 grams. A latte is a milk drink, and the tea needs enough presence to stay visible through all that dairy. Reducing the milk volume slightly — from 180 mL down to 150 mL — also helps. Think of the ratio as a conversation. The tea should not be shouting, but it should not be whispering either.
Gritty mouthfeel, different from clumps, suggests the Matcha itself is coarsely ground. Finer milling produces powder that suspends more evenly and feels smoother on the palate. If you have sifted carefully and the grittiness remains, the issue is likely the powder rather than the preparation. Look for Matcha that is stone-milled or labeled for drinking rather than cooking.
Matcha latte vs Hojicha latte
Both are Japanese tea lattes, but they suit different moods. A Matcha latte is bright and forward — grassy, slightly savory, with a clean lift from theanine and caffeine — and works best in the morning or when you want focused energy without espresso's sharpness. A Hojicha latte is warmer and more settled — roasted, nutty, lower in caffeine — and tends to suit afternoons or evenings when comfort matters more than stimulation. The choice is mostly about what you want the drink to do.
A Matcha latte is bright. Grassy, sometimes savory, with a clean lift from theanine and caffeine working together. The color is vivid green. The flavor is forward and present. It tends to suit mornings, or any moment when you want something that wakes you up gently without the jolt of espresso.
A Hojicha latte is warm. Roasted, nutty, with toasted grain notes and a softness that feels more like settling in than leaning forward. The color is amber-brown. The flavor is mellow and rounded. It tends to suit afternoons and evenings, especially when comfort matters more than stimulation. Hojicha also contains less caffeine than Matcha in most preparations, which makes it a friendlier choice later in the day.
The milk behaves differently with each tea too. Matcha's vegetal, umami-driven character can sometimes push against dairy in a way that demands attention, so the drink stays lively on the palate. Hojicha's roasted notes settle into milk naturally, almost like the tea was designed for it. Neither interaction is better. They simply create different kinds of cups.
If you have been making Matcha lattes and want to try the other side, our Hojicha latte recipe walks through the roasted version with the same level of detail. Having both in your routine is one of the quiet pleasures of Japanese tea at home.
At FETC, we think of the Matcha latte as a bridge. It connects daily convenience — a quick cup, a familiar format — to something with real depth underneath. The powder carries shade-growing, careful milling, centuries of tea culture compressed into a fine green dust. Milk does not erase that. When the Matcha is right and the preparation is gentle, the latte becomes a way of meeting the tea on comfortable terms without losing what makes it worth drinking in the first place.
Start with good powder. Sift it. Keep the water below boiling. Whisk until smooth. Then add your milk and see where the cup takes you. The best Matcha latte recipe is not really a recipe at all. It is an understanding of the tea — and from there, the drink makes itself.
Frequently Asked Questions
What Matcha works best for a latte?
We like a latte-grade Matcha with vivid green color, gentle bitterness, enough body, and natural sweetness. The highest ceremonial powder can be too delicate, while cheap culinary powder often turns flat in milk.
What is the recommended starting ratio for a hot Matcha latte?
Start with 2 g Matcha, 30-40 mL water at about 80°C, and 150-180 mL milk heated to 60-65°C. Whisk in a matcha bowl or wide cup for 15-20 seconds, then adjust to taste.
Why should I sift Matcha before adding water?
Sifting breaks up tiny compressed clumps before they touch water. Once Matcha gets wet, those clumps are harder to fix, so a quick pass through a fine mesh sieve gives a much smoother latte.
How do I make an iced Matcha latte without watery flavor?
Make a hot concentrate first: 2 g Matcha with about 25-35 mL water at 80°C, then pour over ice and add 150-200 mL cold milk. Use slightly more powder or less water if the ice dilutes the tea.
Which beginner mistake makes a Matcha latte bitter?
Water that is too hot is the common culprit. Above about 85°C, Matcha can taste sharper and more astringent, so bring the water down to 80°C before whisking and check the powder quality if bitterness remains.